

Today, I share a blog post on how we can enable Kerberos authentication for cloud-only identities on Azure file shares. Azure file shares can come handy when a file share is needed from every location and working with a cloud managed device, but till a short while back we could only enable Kerberos authentication for hybrid user identities like I wrote in this article. For a company working with cloud managed devices and cloud-only users, there wasn’t a Microsoft solution to authenticate against an Azure file share. But time changes and so do the solutions of Microsoft, so lets have a look at how we can set this up.
Requirements
There are some requirements to work with Azure file shares and cloud-only identities:
- Windows 11 Enterprise/Pro
- Cloud-only identity
- Default share-level permissions
- Disable MFA
You must disable multifactor authentication (MFA) on the Microsoft Entra app representing the storage account, it is just not supported for Azure file shares. But to secure access to the Azure file shares we can use other requirements in Conditional Access policies, but more on that later in this post.
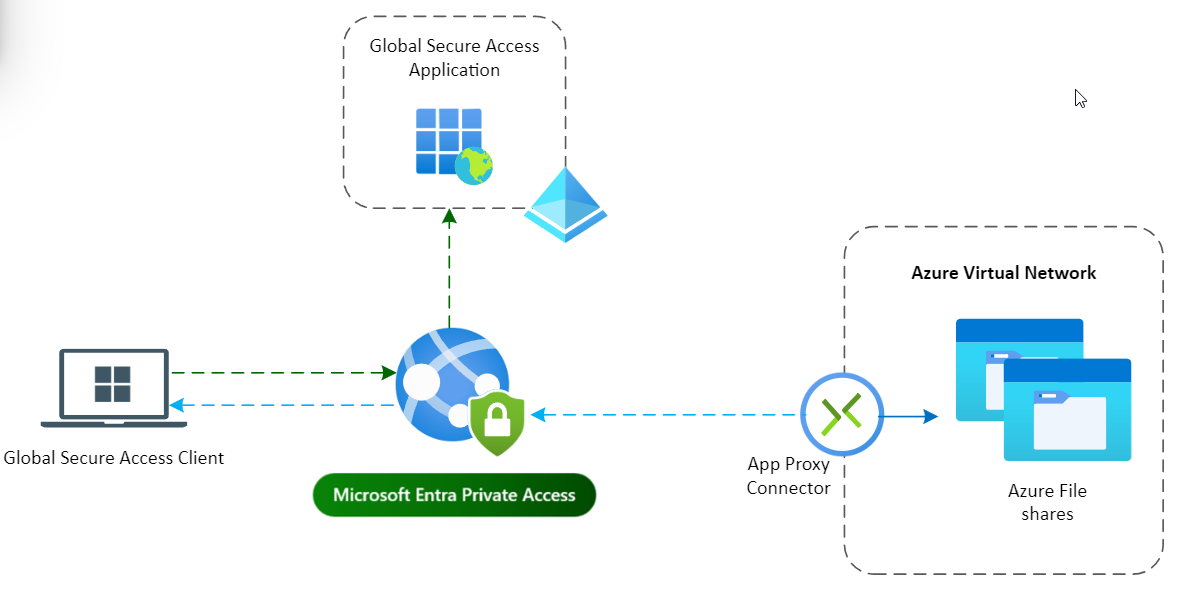
We could also use Microsoft Entra Private Access and only allow access to the file share via this solution, which might also become handy for users from which the ISP blocks SMB port 445.
Enable Microsoft Entra Kerberos authentication for cloud-only user accounts
I assume you know how to create a storage account with a file share and therefor directly move to configuring Kerberos authentication on the file share. If not, please refer to my previous article where it is described.
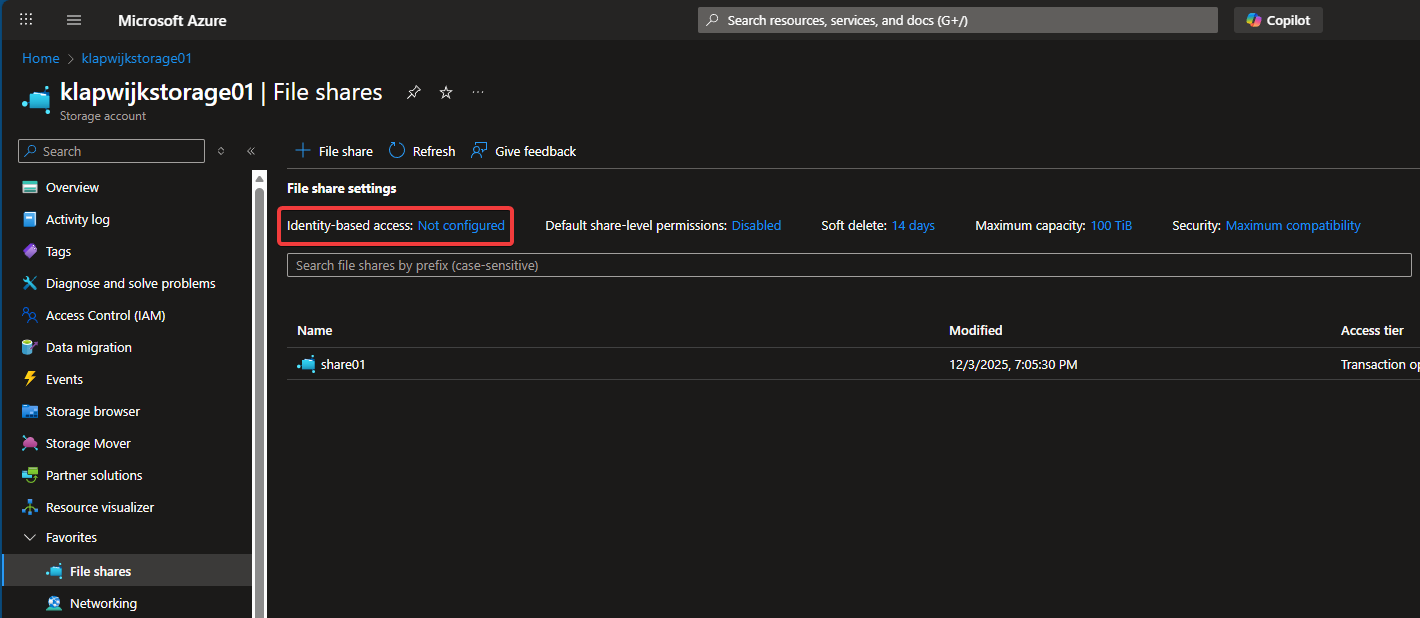
On the Files shares tab (under Data storage) click on Not configured which is shown behind Identity-based access.
Click Setup under Microsoft Entra Kerberos.
Set a checkmark behind Microsoft Entra Kerberos and click Save.

The most challenging part for me was configuring sharing permissions, as I didn’t read the docs.
I was used to setup more fine-grained share permissions on the file share level and not use default share-level permissions.

So make sure to select Enable permissions for all authenticated users and groups and select the appropriate role.

Grant admin consent to the new service principal
In the background, a Microsoft Application was registered in Microsoft Entra ID when we enabled Kerberos authentication. We need to explicitly grant admin consent to the new Microsoft Entra application, which is the next step in our setup.
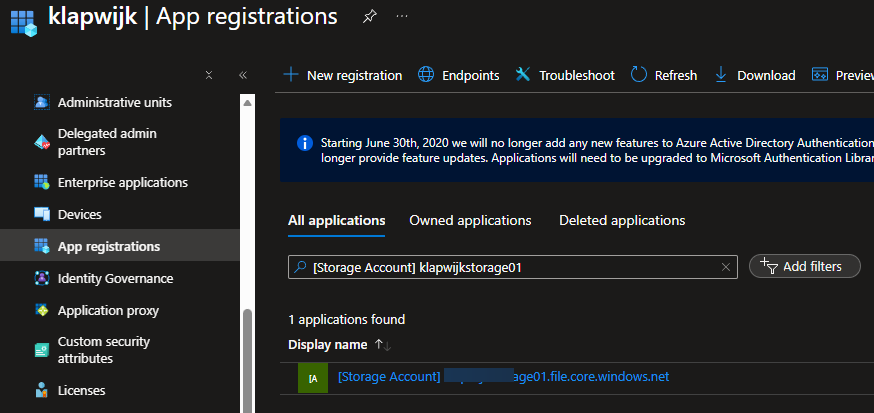
Browse to App registrations in the Azure portal and to the All applications tab. Search for [storage and you will find the automatically created application. Select the application with the name matching [Storage Account] .file.core.windows.net.
On the Permissions tab click Grant admin consent for [domain name] to grant the requested API permissions. Click Yes for a confirmation.

Configure Conditional Access policies
As we can read in the documentation multi-factor authentication is not supported. This means we need to make sure no MFA is required for the previously created Microsoft Azure application.
If you for example require MFA for All cloud apps in a Conditional Access policy, you need to exclude the application from the CA policy.

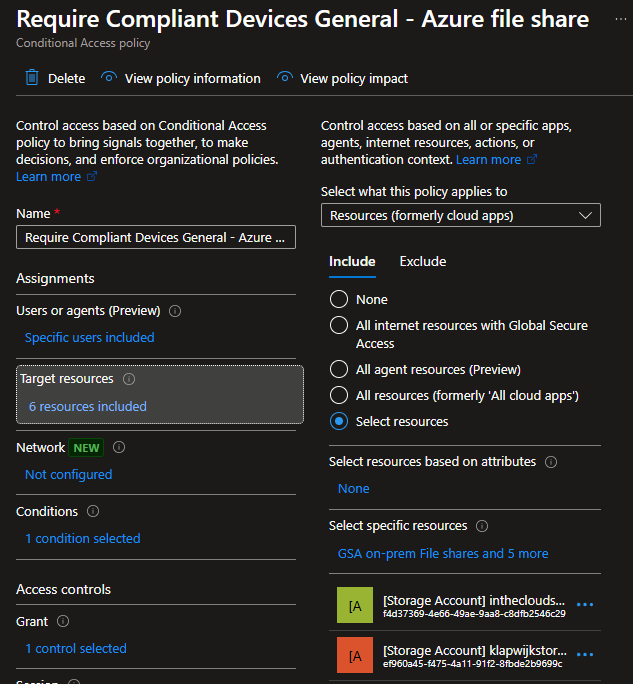
But the availability of the App registration also allows us to include the app in our Conditional Access policies and require a compliant device to access our Azure file shares.
And as we can see in the sign-in logs from my account, the CA policy is triggered when I want to reach the Azure file share.

If you want to further secure access to the file share you can block public access to the storage account and allow access via Microsoft Entra Private Access.
To read more about that, read this post.
That’s it for this post.
Thanks for reading!
2 Comments
I want to connect from the VM which is non entra-id (azure ad) join and login to the local account of the VM and mounting the share..how we can achieve it any idea?
The same method of using cloud kerberos ticket retrieval for AzureFiles shares also works for Entra Joined Windows 11 computers providing SMB shares.